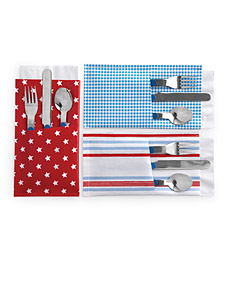
I love all the fun things you can do with simple things, things you may already have around your house. Plain white dishes (even paper plates!) can be dressed up with red and blue accessories, like napkins, star garland, red or blue chargers (or spray paint wicker paper plate holders), or even utensils tied with pretty patriotic ribbon. Give a couple of tin cans a makeover with red, white and blue paint, some ribbon, and punch a few holes to create unique lanterns you can hang or set on a table, porch railing or line a walkway. Add a cheap tealite (or go a step better and use citronella candles to ward off the bugs). Another idea is to paint a can and decoupage an image to the side and punch holes around it, or use as a vase for flowers (just use a small cup inside to hold the water). To hang, punch a hole on each side, and string ribbon through the holes, securely knotting on the inside, then hang from hooks, nails...whatever.
I like all of the following ideas (all from Martha Stewart) to create a patriotic flair

Tools and Materials12-inch-high roll of flag-pattern bunting
Scissors
Straight pins
Sewing machine
Wide pale-blue grosgrain ribbon

1. Measure the desired length for the trim. Roll out the bunting to a length that's about two times that measurement; cut.
2. Trim the bottom four stripes (red, white, red, white) along entire length of bunting.
3. Pleat the fabric: First, lay the fabric down, wrong side up so that the blue blocks of stars run along the bottom. To make a single box pleat, crease both edges of a red-and-white block (where the stripes meet the blue block), and then fold both creases so they meet in the middle, covering the stripes; essentially, you're matching blocks of blue to blocks of blue. Pin in place. At the same time, pin the ribbon in place, covering the top two stripes. Repeat along length of fabric.
4. Sew along the top of the panel, through the ribbon and pleats, using a straight stitch. Remove pins. Hang with nails or as desired.
I really, really like this idea, because you can do the same with clear plastic drink glasses, with any paint pens, so no worries about glasses getting broken!!!

Tools and MaterialsStar Template
Glasses
Tape
Red and blue paint pens
Star Glasses How-To1. Download and print the star template. Center it inside the glass, and affix it to the glass with tape. Using the red and blue pens, start filling in the spaces of the star with dots (you can use different sizes and place them as randomly as you like). Let the paint dry for 24 hours.
2. After the glasses have dried, place them into a cold oven. Turn the oven on to 325 degrees, and bake the glasses for 40 minutes. Turn the oven off, and let glasses cool, leaving the door ajar. Now the paint is set, and the glasses can be washed in the dishwasher.
I like this one, because its really easy to do, and makes a really bold statement at the same time.
And just for a "sweet" ending

Ingredients
Makes 6 four-inch tarts- 1 cup plus 2 tablespoons all-purpose flour
- 1 1/2 tablespoons plus 3 tablespoons sugar
- 1/2 teaspoon salt
- 1/2 cup (1 stick) chilled unsalted butter, cut into small pieces
- 1 large egg yolk, lightly beaten
- 1 tablespoon ice water, plus more as needed
- 1 1/2 pounds (2 pints) fresh strawberries, hulled, washed, and halved or quartered if large
- 2 cups creme fraiche
Directions
- Place the flour, 1 1/2 tablespoons sugar, and salt in a food processor. Pulse to combine. Add butter, and process until mixture resembles coarse meal.
- In a small bowl, mix together egg yolk and ice water. With machine running, add egg mixture in a slow, steady stream through the feed tube. Process until dough just holds together, about 20 seconds. If dough feels dry, add more ice water, 1 tablespoon at a time.
- Preheat oven to 400 degrees. Divide the dough evenly among six 4-inch tartlet pans; gently press into pans. Prick bottoms with a fork. Refrigerate shells until firm to the touch, at least 30 minutes.
- Line each shell with foil, and fill with pie weights or dried beans. Place tar pans on a rimmed baking sheet; bake until the edges just begin to brown, about 15 minutes. Remove foil and weights. Continue to bake until bottom of crust is golden brown and crisp, about 10 minutes more. Transfer to a wire rack; let cool completely. Remove shells from pans.
- Meanwhile, in a medium bowl, mix strawberries with remaining 3 tablespoons sugar. Cover with plastic wrap, and let macerate until juicy, about 1 hour.
- When ready to serve, fill each tart shell with about 1/3 cup creme fraiche; divide strawberries evenly among tarts.
