Wednesday, October 27, 2010

Halloween

I know Ive been a bad blogger. But, I try. Hopefully everyone found my last posting useful in preparing for fall and winter baking? Todays post is just a quick Halloween post, to remind you all Im here. Tomorrow, hopefully, Ill take some Halloween pics from around the house and share them.

One of my favorite things about Halloween is the colors. I mean, when else can you use black, orange, purple and lime green together?? But, I love the combo of black and orange, and while it wouldnt fly to use those two all year, I get to for a whole month. A few of my favorite ways to combine black and orange:

If youre wanting to continue using your pumpkins through Thanksgiving, use no carve ideas like these from Better Homes and Gardens. I also like painting and glittering mini pumpkins and hollowing out just the tops for t-lights. Perfect too for little ones that cant carve yet!

pumpkin and crow


Wrapped up


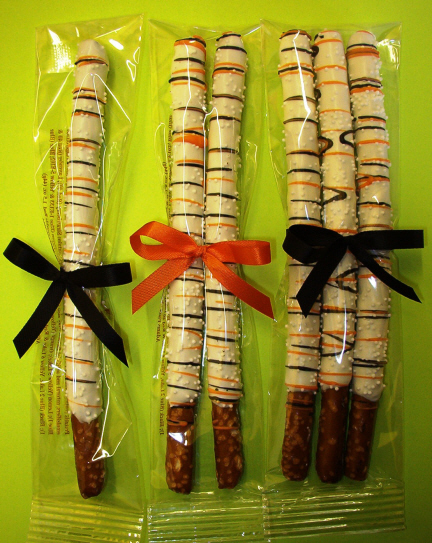
I found these to be absolutely adorable for using as party favors:


More to come tomorrow!

Thursday, September 16, 2010

Autumn Is Upon Us

Fall is just about here, and I have to say Im really glad! We only had about 1 1/2 weeks worth of unbearably hot weather this whole summer, but Im ready for the leaves to change, for Halloween and Thanksgiving, for hot cider and pumpkin pie, and for BAKING!! While it may not have been so hot we couldn't stand it, it still wasn't cool enough to bake a bunch of goodies everyday in my kitchen. This old house couldn't have handled the extra heat from the oven.
Instead of writing about fall cleaning I thought a post on baking would be a great way to get everyone ready for the fast approaching autumn days and of course, the upcoming holidays. There is nothing like a homemade gift from the kitchen, and no memory sweeter than sharing a sweet with your family and friends.

One of my favorite things to do is bake. I love the feelings I get, the smells and the warmth, and of course, the goodies that come from a day of baking! Melt in your mouth cookies, moist cupcakes and breads, sweet, flaky pies.....
Before you can embark on your baking adventures this baking season, you will need to make sure you have everything you need on hand. Nothing worse than having to forgo a recipe because you were out of an important ingredient! So dig out your baking supplies and replenish what you need.... 

*A few things to keep in mind:*
Buy new pans if any are warped or rusty. You want pristine and even goodies.
Invest in decorative bags and cardboard containers for quick gifts and easy storage
Go through all your recipes, or research new ones, and pick out several you want to make this season. This will help with your ingredients list when you are going through your pantry.
Make room. In your freezer that is. A lot of baked goods can be frozen several days, weeks, or even months ahead. This will save you time and you will have something on hand for those last minute parties and house guests.
Check your oven for loose seals or bent racks, and give it a good cleaning. Dont forget your broiler!!!
Check the expiration dates on your baking supplies. A fresh can of baking powder does wonders!


Baking tools to have:
bench scraper
timer
wooden spoons
a mixer (Don't fret if you haven't got one, its not needed and I often dont use mine.)
wet and dry measuring cups, I like to have several sets
a couple sets of measuring spoons
several mixing bowls of varying sizes
parchment paper (heat resistant and non-stick)
pastry brushes, bags and tips
round, square and rectangle cake pans
pie plates
baking sheets
cupcake tins
spatulas
whisks
wire cooling racks
wooden rolling pins
cookie cutters
tooth picks
paper cupcake cups (I will sometimes line a cupcake pan with them and pre-measure my dry ingredients, especially when Im making a couple different recipes in a row. To distinguish the recipes, I will use different colored cups, or insert the recipe next to the row. Easy clean up!)
candy molds
lollipop sticks

Supplies most likely needed for baking
real butter; salted and unsalted (Have a few pounds on hand. It goes quick when baking!)
flour
bakers sugar
regular sugar
light and dark brown sugars
baking soda and powder
salt
corn starch
shortening
vanilla and other special extracts (i.e. almond or rum)
cocoa powder
chocolate barks and morsels (assorted chocolates, including white and dark. I keep mine in the freezer and take out before starting the recipe and pre-heating.)
coconut
powdered sugar
nuts
sprinkles
food coloring
any fruit for specific recipes (pies, crisps, breads, etc.)
corn syrup
maple syrup
molasses
cooking spray
eggs
milk
peanut butter

Happy Baking!!!!! 

Monday, August 9, 2010

Beyond PB&J

Just two more days until the first day of school!! I cant wait, and neither can my girls. Theyre already antsy, and talking about what theyre going to wear the first, second and third and fourth days! Crazy kids...

With back to school coming, thoughts of lunches swirl through my head. Its always a challenge to feed them creatively and healthily, and still get them to eat what Ive packed in their lunch boxes. Not to mention, most days half their lunch comes back home! There just is not enough time for them to enjoy a lunch because, lets face it, who wants to eat for half an hour when they could be playing instead? Food is scarcely eaten, and what is eaten is scarfed down faster than you can say "pb&j"! Forget the grapes or carrot sticks, their going to eat the sweet and salty stuff before they even notice the good for you stuff. And the school lunches that are served just make me cringe! So whats a mom to do?

Make it short and sweet. A little bit goes a long way, especially when youre trying to give them nutrition along with quickness. Pack a little of everything- a little main event, a little fruit, a little veggie, and a little treat. If youve got a crust free sandwich eater, cut the sandwich into shapes that interests your child, so they arent wasting half the sandwich pulling the crust off and its interesting enough that they will WANT to eat it. Give them a little variety too; include colors that appeal and shapes that tantalize.

Here are some great lunch box ideas to get you started!


Sandwich Art
Sandwich Art


null
Lady Bugs on a Stick


PB & J Blossom Sandwiches
PB&J Blossoms


http://familyfun.go.com/assets/cms/recipes/snail-snack-recipe-photo-420-FF0605ALMDA01.jpg
Snail Snack Sandwich


soup
Abc Noodle Soup


I love the idea of reusable ANYTHING and these are perfect for kids lunches:


Bag_photos01
Reusable Sandwich and lunch bags, from Graze Organic
 Ive been kicking around the idea of making some reusable sandwich bags for awhile now, and these are incredibly inspirational.


Speaking of back to school, my count down was a hit! The girls loved getting their little treats out of the tubes, which were tied with red string. The last two days have nothing inside, because they dont fit, but its actually got them guessing. Seems like every couple hours theyre asking what it is. Heres my own (simple) version of the family fun toilet paper roll Back To School countdown:


Stay tuned for my banana "syrup" and pictures from Back to School!

Tuesday, August 3, 2010

Back to School

 Back to school is always a little bittersweet. Youre happy to see your kids sweet little faces all day, but you experience a little thrill when they go back to school too. And who doesnt love back to school shopping?? I know I do...I get a little excited just from buying the packs of pencils, crayons and new lunch boxes! Not to mention the clothes for the little darlings...

And my newest little thrill? Back to school decorating! With one short day of special treats and a week long countdown, I add a few extra special touches to my home, for my kids.

Sort of....maybe just a teensy bit for myself, too. Shhhh!

Our week long count down starts tomorrow, and I usually use an "apple" chain, made from red card stock cut in apple shapes about the size of my hand, and use news paper for the numbers glued to the front. Each day the kids would take an apple off the chain, and behind the apple would be a simple thing written, like "Time for a trim!" and a new pack of ponies would be attached, or, " Pack those Bags!" and we would get out the back packs and pack them up.

But this year I found something new to do! Im going to re-create this idea from family fun to make it my own, but I couldnt help loving the idea!!


For ours, Im going to cover the tubes with news print, use a tape measure to wrap around the tubes for the numbers, cut little red apple shapes and hang from the tubes and write a little saying with black marker. In the tubes will be little "treats" relating to each saying. Pony tail rings, eraser caps, pencils, sharpeners....the last day will have something extra special in it, just havent decided quite yet what it will be. Once I get it finished, Ill post pics and what I wrote and put in the tubes.

 Count the Days

The first day of school is a day filled with anticipation. Will my friends be in my class? Will I like my teacher? So why not make it as special as possible? Use the whole day to relieve some of the stress on them, by using school themed treats, like these, to send in to their class, or for after school.

 I just loved these from my friend Brittanie over at cupcakes kisses 'n' crumbs, but not sure where she found these ideas!

https://blogger.googleusercontent.com/img/b/R29vZ2xl/AVvXsEi86z2xrpHIzTuPbGKwhaX5ON1u59Tw67pAX5fB4hk3feiiT6xQH2Rgp83mvnYtW4neOKxLR-3cOubEkmskp7AG9DAKFFx1pCQLMOVr8RV5Pz_6KsawLbkZ2j-3rSBuvmfINCXQtUUUxJA/s1600/apple_cupcake_bouquet__96489.png

Then, for a few added touches:
* "graded" pancakes-pancakes shaped like the grade your child is entering. Use a baster and fill with your mix (might not be a good idea to use fruit inside!) and on a hot griddle, quickly scribble the grade, connecting the "st, rd, th's" to the number. For kinders, use a "K".
* cut out apple shapes, pencil shapes, number and letter shapes, any kind of school related shapes in bread for french toast, and/or sandwiches
* fill an empty tin can with reular brown pencils and wooden rulers, and use as a center piece for the dining table, and core apples and place little t-lights in them. Rub a lemon around the cut to prevent browning.
* if you can find some school related fabric, use for a table cloth, napkins or in a bread basket.
* cut up a fabric tape measure, or if you get lucky some ribbon like one, and use as napkin ring holders
* cut out some school shapes and letter shapes from card stock to make a banner to hang by the dining table.

These are all things I do for the first day of school. I change it up each year and add a few different elements, but my kids always feel good about leaving, and are excited to come home and see their treats!

Happy Back to School!!


Monday, August 2, 2010

Oh, my GOODNESS!

It has been awhile since I last posted!! Summer has definitely kept me busy....Well, I guess not summer itself, but the children I had to occupy! And boy, have I occupied them. We have visited two (yes, TWO!!) amusement parks; both Disneyland and Legoland, went swimming I dont know how many times, had craft days and movie days, sleepovers and library visits, lake days and did back to school shopping several different times.  Weve played the wii, we've had root-beer floats and trips to the Dairy Queen. We have one whole week left before its back to school, and I plan on filling it with even more fun! Ive got a trip to the Natural History Museum planned and a tour around the Botanical Gardens. And then in two weeks, our annual camping trip in the beautiful Sierra Mountains! The girls cant wait, and neither can the husband and I! Its so beautiful and peaceful up there, and the fishing is great!

I also completed Alanna's bedroom! It looks fabulous, if I do say so myself! I went a little crazy but she is completely ecstatic over the results. She has since added her own flourishes, like a pillow she made herself at her aunts and various stuffed animals and toys. And, she has made ENORMOUS use of the seat I refashioned from my old chest. She stuffed it full of things. And I gotta say, Im really proud of how well she has maintained her room. She has even started doing her own laundry!!! My baby girl is growing up! Here are some really horrible pictures I have yet to update....

her little reading corner
her pillow she made herself! and my own handy work on the walls ( there is now a third horizontal matte with the first, for a set of 3)
her desk, shelf and nightstand
her dresser is painted with chalboard paint, and recently sports ribbon drawer pools in hot pink and silver
every girl needs a monogram!!
this lamp replaces the little pink one she had
the sheer fabric is silver sequins. nice and shimmery!


I had really planned on posting more often, I wanted to do Christmas in July, and share some fun things to do over the summer, but I just couldn't find enough time (or energy!) to do a decent post.

But, Im committing myself to posting as much as possible before my vacation starts. Ive got a lot planned, and have been planning my holiday crafting already. Look for some back to school ideas over the next couple of days! I cant wait to get started!!

Friday, May 28, 2010

Its Memorial Day weekend! Time to honor our troops and the soldiers who have given their lives to protect and serve us. A huge, huge thank you to our troops, and their families, from our family. We cant show enough just how deep our gratitude is!! It seems as if it everyone loves to have a bbq, hit the beach, lake or just the pool in celebration, and spend the whole weekend with family and friends. There is a plethora of goodies and ideas to make your Memorial Day pretty awesome, from dishes to patriotic food and red, white, and blue decor. Im fairly patriotic myself, and really enjoy flying my colors, so to speak.

I love all the fun things you can do with simple things, things you may already have around your house. Plain white dishes (even paper plates!) can be dressed up with red and blue accessories, like napkins, star garland, red or blue chargers (or spray paint wicker paper plate holders), or even utensils tied with pretty patriotic ribbon. Give a couple of tin cans a makeover with red, white and blue paint, some ribbon, and punch a few holes to create unique lanterns you can hang or set on a table, porch railing or line a walkway. Add a cheap tealite (or go a step better and use citronella candles to ward off the bugs). Another idea is to paint a can and decoupage an image to the side and punch holes around it, or use as a vase for flowers (just use a small cup inside to hold the water). To hang, punch a hole on each side, and string ribbon through the holes, securely knotting on the inside, then hang from hooks, nails...whatever.

I like all of the following ideas (all from Martha Stewart) to create a patriotic flair

Stars-and-Stripes Gazebo Trim
Box-pleated bunting adds a crowning touch to a gazebo or other outdoor structure. We trimmed the traditional flag design to highlight the blue-and-white part of the pattern. For crisper folds, iron the pleats as you make them.
Tools and Materials12-inch-high roll of flag-pattern bunting
Scissors
Straight pins
Sewing machine
Wide pale-blue grosgrain ribbon

bd0607_summer1.jpg
Gazebo Trim How-To
1. Measure the desired length for the trim. Roll out the bunting to a length that's about two times that measurement; cut.
2. Trim the bottom four stripes (red, white, red, white) along entire length of bunting.
3. Pleat the fabric: First, lay the fabric down, wrong side up so that the blue blocks of stars run along the bottom. To make a single box pleat, crease both edges of a red-and-white block (where the stripes meet the blue block), and then fold both creases so they meet in the middle, covering the stripes; essentially, you're matching blocks of blue to blocks of blue. Pin in place. At the same time, pin the ribbon in place, covering the top two stripes. Repeat along length of fabric.
4. Sew along the top of the panel, through the ribbon and pleats, using a straight stitch. Remove pins. Hang with nails or as desired.

I really, really like this idea, because you can do the same with clear plastic drink glasses, with any paint pens, so no worries about glasses getting broken!!!

Star Glasses
A perfect gift for a Memorial or Independence Day host, these patriotic tumblers are created using a process similar to eglomise -- the 18th-century French technique of painting directly on the reverse side of glass. For this project, Martha uses special, nontoxic, dishwasher- and microwave-safe paint pens, which create an effect that is rich and colorful yet translucent. When downloading our star template, keep in mind that it is designed to fit a 4 3/4-inch-tall glass but can be centered in any glass you like; alternately, you can enlarge or reduce the image, using a photocopy machine.
Tools and MaterialsStar Template
Glasses
Tape
Red and blue paint pens
Star Glasses How-To1. Download and print the star template. Center it inside the glass, and affix it to the glass with tape. Using the red and blue pens, start filling in the spaces of the star with dots (you can use different sizes and place them as randomly as you like). Let the paint dry for 24 hours.
2. After the glasses have dried, place them into a cold oven. Turn the oven on to 325 degrees, and bake the glasses for 40 minutes. Turn the oven off, and let glasses cool, leaving the door ajar. Now the paint is set, and the glasses can be washed in the dishwasher.

I like this one, because its really easy to do, and makes a really bold statement at the same time.
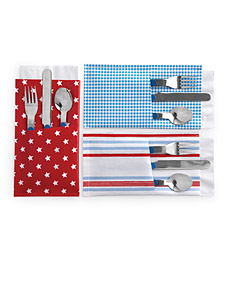
   Pocket Knives (and More)

Keep silverware and napkins in one place for picnics and other meals on the go. Oilcloth is the ideal material for this pocket project; it won't fray, plus it can be wiped clean easily. Start with a 9-by-10-inch rectangle in your favorite pattern (we went with a mix of stars, stripes, and gingham). Fold in half vertically. Make a slightly diagonal slit, about 3 inches long, just above the midway point. Stitch the long side and bottom closed, about 1/8 inch from the edge. Leave the top open for napkins, and use the front pocket for utensils.

And just for a "sweet" ending


Strawberry Tartlets


Ingredients

Makes 6 four-inch tarts
  • 1 cup plus 2 tablespoons all-purpose flour
  • 1 1/2 tablespoons plus 3 tablespoons sugar
  • 1/2 teaspoon salt
  • 1/2 cup (1 stick) chilled unsalted butter, cut into small pieces
  • 1 large egg yolk, lightly beaten
  • 1 tablespoon ice water, plus more as needed
  • 1 1/2 pounds (2 pints) fresh strawberries, hulled, washed, and halved or quartered if large
  • 2 cups creme fraiche

Directions

  1. Place the flour, 1 1/2 tablespoons sugar, and salt in a food processor. Pulse to combine. Add butter, and process until mixture resembles coarse meal.
  2. In a small bowl, mix together egg yolk and ice water. With machine running, add egg mixture in a slow, steady stream through the feed tube. Process until dough just holds together, about 20 seconds. If dough feels dry, add more ice water, 1 tablespoon at a time.
  3. Preheat oven to 400 degrees. Divide the dough evenly among six 4-inch tartlet pans; gently press into pans. Prick bottoms with a fork. Refrigerate shells until firm to the touch, at least 30 minutes.
  4. Line each shell with foil, and fill with pie weights or dried beans. Place tar pans on a rimmed baking sheet; bake until the edges just begin to brown, about 15 minutes. Remove foil and weights. Continue to bake until bottom of crust is golden brown and crisp, about 10 minutes more. Transfer to a wire rack; let cool completely. Remove shells from pans.
  5. Meanwhile, in a medium bowl, mix strawberries with remaining 3 tablespoons sugar. Cover with plastic wrap, and let macerate until juicy, about 1 hour.
  6. When ready to serve, fill each tart shell with about 1/3 cup creme fraiche; divide strawberries evenly among tarts.
 Dont forget to thank a Soldier! They give up so much for us....

Thursday, May 20, 2010

Summertime

Summer is well on its way here, with its warm breezes and hot sunshine, fresh squeezed lemonade and oh so good bbq, swimming pools and Popsicles. Dont forget naps in the hammock..... Its seems like it took a long time for the temps to warm up around here and for the sun to shine. It was cold and rained a lot, here and it seems all over the place, seems as if spring is really just starting.  Hard to believe summer is only a month away!

Some of my favorite childhood activities during the summer months involved being outside- roller skating, pitching a tent in the yard, swimming or running through the sprinklers....Now Ive got my own children laughing and enjoying the same things I did, with the glee and spunk and enjoyment only children seem to have. And as a parent I get to relive summer in a whole different way.

Days are long in the summer, extending the fun well past bedtime. The warm nights are an extension of the day. Eating roasted marshmallows beside a campfire during camping trips, watching the stars twinkle, going to the drive in in the middle of the week, having ice cream and pie on the porch....I could list a hundred different things to do in the summer, and maybe I will in another post, but for now I hope to leave you all anticipating summer like a kid again. I know I am!

Tuesday, May 18, 2010

I didnt get as many postings up yesterday as I had hoped. I had a bunch of running around to do that took up too much of my time!!! Ill do a quick post right now of a very simple thing: a vanity seat, chair, and storage box all rolled into one. My daughter has a chair-a big black leather chair that is so comfy you never want to get up-but she needed something to use at her desk/vanity, and also another seat for when she has friends over. And I wanted her to have something she could use to store her toys too (she is still a kid after all!!), but space is limited.

Well, I thought a chest would be a nice thing, but have you seen the prices for some?? Then I thought my husband could make her something. But his time is limited, and the cost was still more than I wanted to dole out. THEN I remembered we have these little cubes from our childhood. Somehow my husband and I both wound up with these little wooden storage cubes with lids when we were kids. Go figure. Weve had them in the basement, using them to store things we (meaning he) were too lazy to get rid of. And whaddya know, they are the perfect size!!! Well, one is anyway. Its an exact fit for under the desk and doesnt take up too much space in the room when its out. PERFECT!!!

So, I got an old square throw pillow, some batting, a staple gun and some material, and turned a cutesy cube with papered kitties into a multi-functional piece of furniture, for less than ten bucks.

Here it is!


The material is velvet, which is the same as the curtain panels will be. I had originally added some tulle around the seats edge in her rooms colors, but she likes it better plain, so I removed it. The whole seat lifts off for storing her stuff. And were on our way to finishing the room!!!
Keep an eye out for my next post, because I think everyone will like what I did alot!!!

Monday, May 17, 2010

A quick re-do

It was at a garage sale a few years ago that I came across this lucky find; a pretty memo board, just begging to be re-done. I could never bring myself to tear the fabric off, because it was so pretty and well preserved, but it never went with my home decor, so it went unused and unchanged. Until last week.

I decided to use it for my daughter's bedroom instead of searching for the perfect one for her room. A new piece of fabric, some ribbon, batting and chalk board paint changed this:


Into this: 


Im pleased with the results (even though its not perfect!), and so is my daughter. She has already used chalk on it, but Ive put it up to keep it from getting ruined before we can hang it. That sort of stuff happens around here a lot....
Oh man, has it really been two weeks since I last posted?? I feel bad....but I'm going to make up for it! I have a few things to share; the befores and semi-afters (I say semi because we haven't quite finished) of our oldest's bedroom renovation, a few projects I've completed for her room, and Ill share a few quick and easy recipes that my family loves. Keep an eye out all day today for posts.


To kick it off, heres a look at the befores and afters of our "office to bedroom"
We haven't finished yet, but I expect to be done this week. And please, pay no mind to the mess we made!! We're really good at mess making!

The first is of the shelves before, they are staying for all her books and what-nots. The next is the whole desk unit we tore out (and all the junk we had stored). We had to patch a a lot of the wall where the plaster pulled away. The third is of the closet and bathroom doors, and the linen closet, which we did not remove. Picture number four shows our handy work with a paint brush, the newly empty space, and a bunch of crap on the floor from painting! The last is of her window and the bathroom and closet door space.

Monday, April 26, 2010

Getting ready for company

On Wednesday Im having a few friends and family members over for a candle party, with Partylite. I really enjoy their candles and products, and having a small party is a great way to get free stuff, or at least almost free! The products are high quality, so I much prefer them over getting some generic candle. The scent stays for the ENTIRE burn of the candle, and there is never any residue when theyve melted down or awful smell when putting them out.

Anyhow, its not really a PARTY per say, more a small gathering, with appetizers and drinks. Even though its not a big deal, I still like to get my house in tip-top shape, because every little thing matters when youre having people over. I have a few things that need doing, little extras that Ive put off because they require a little extra time and effort. Things like the doors in the family room need to be painted, a strip of chair rail that got missed somehow needs to be painted.....just dumb things that Ive avoided doing.

Then there are the bigger things that I personally feel are important when having company over. Cleaning the couches is a big thing, I have white floral couches that need frequent cleaning. Cleaning the chandelier is another thing. I think its the big things people notice most, so Im concentrating on those today.

So, I thought I would share my cleaning list for the next few days. Maybe give some of you an extra idea or two when youre having your own company over.

Today, Monday I am:
cleaning the couches
painting the forgotten doors and chair rails
vacuuming under and inside the couches
spot treating the carpets

Tuesday:
dusting the chandelier and bulbs of all lamps
washing the walls, doors and baseboards
wiping the cabinets in the bathroom and kitchen down
washing the shower curtain
pick up cups and napkins
preparing the appetizers

Wedenesday:
regular cleaning of just the kitchen, family, living and dining rooms, as well as the bathroom
washing the windows and mirrors
sweep front walkway and porch
final little touches like filling vases with flowers, changing out the hand towels, creating the buffet, filling the candy dishes
baking the appetizers


I have these really great summery dishes to serve the appetizers in, since its a "Spring Into Summer" party. I plan on making mini quiches and strawberry lemonade bars for a sweet, with lemonade and water.

Thursday, April 22, 2010

HAPPY BIRTHDAY!!!  

Today is the day our second baby, Emma, was born. She is such a joy to us, always ready to help out her sisters, her dad or me. She is very loving and feels everything straight to the heart, our Emma. She loves to ride her bike, and today she is getting a brand new one! I know she will be soo surprised and will want to ride it right away. Here is our beautiful little girl!


But the rain came back this week, and its wet and cold out, so she may not get the chance. Im hoping it wont be raining when she opens her presents. Were hoping it holds off until  everyone arrives safe and sound for and after dinner and cake. She has both sets of grandparents coming, and her aunt and uncles will be here too. She requested chicken enchiladas for her birthday dinner, so I thought I would share the recipe with all of you, in another post tonight or tomorrow.

Today is also Earth day. How are you celebrating it?

Here are a few ideas for taking care of our Mother Earth. 

*recycle anything and everything you can
*create a compost bin for paper scraps and combine with wood shavings, grass clippings, dead flowers and left over fruit and veggie peels and cores, and egg shells. A big wood crate or plastic trash can works fine, or you can even just make a pile; place in a sunny place, wet down and turn once in a while. Use it to fertilize your gardens.
*Speaking of gardens, plant one. Trees and flowers go a log way to helping the earth shed nasty air and replace it with clean, healthy air. Use an irrigation water system to cut down on water use and waste, and plant only what grows in your climate.
*Check for leaks in pipes and replace drippy hoses.
*Purchase a low flow shower head, and conserve 50-70 percent of water  use a bucket in the shower to catch extra water, and use to water your garden, bath the dog, even heat to wash the dishes
*use big trash cans to catch rain water, and use to water your garden.
*walk wherever you can.
*use reusable shopping bags. Keep a couple rolled up in the car or in your purse so you remember to bring them.
*use tap water instead of buying multiple plastic bottles, and fill reusable containers
*line dry your clothes, when you can, and when using the dryer do as many loads as possible, back to back. The dryer works more efficiently the more it is used in a row. Dry lightweight clothing, then do towels and jeans, coats and heavy sweaters. The dryer retains its heat and doesnt have to start from scratch heating.
*wash full loads of laundry and dishes in the dishwasher only.
*use green cleaning products or make your own, so less chemicals reach landfills, and ultimately our earth.
*buy things in the largest packages possible, to avoid waste
*buy fresh, locally grown produce, that is in season
*replace regular light bulbs with cfls. the initial cost is more, but you save more in the long run, not to mention you  use 70% less power, and less light bulbs wind up in the landfills.
*to save even more electricity, unplug appliances that arent in use, they still use energy. Use curtains and shades to block out the heat on hot sunny days, and the cold on cold dreary days. Keep your air at 85, and your heater at 60.

The biggest thing we can do, is to spread the word. Tell everyone you know about the benefits of recycling, using cfls, walking and low flow shower heads, anything you can think of. If we all just do our parts, there will be less waste, cleaner air and more natural resources to enjoy as the years come and go.

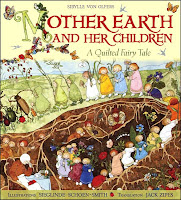
A couple books for Earth Day to enjoy with your kids:

Monday, April 19, 2010

Getting some exercise

Ive been struggling with my weight for a lot of years now, struggling to find clothes that fit right and still make me look attractive. My self esteem has steadily been dropping, despite my dear husband telling me I was sexy or beautiful. I just didnt feel it.  Im not exactly obese, but Im no longer thin either. I need to lose 50 lbs to be within normal range.

Almost 2 years ago, I was diagnosed with high cholesterol and triglycerides. I wasnt totally shocked, because my dad has struggled with it for ages, but Im only 28, and I eat healthier than most people do. So when they (the doctors) told me my numbers were the highest they had ever seen, I was pretty shocked. I thought, "Ok. Ill just start some form of exercise, and eat less fattening foods." Well, I never started working out, I was too busy and had no energy (this was somewhat legitimate, as I had suffered from an emergency abdominal surgery to remove a ruptured ovary, followed by a pulmonary embolism in each of my lungs, and it took me almost a year to recuperate and feel normal again). I had any number of excuses, like not having a partner to feeling silly. Go figure. So a few months after my initial diagnosis, I developed pancreatitis, an incredibly painful inflammation of the pancreas. Ordinarily this is something that happens to people who drink alcohol in excess, but it happened to me because I have extraordinarily high triglycerides, fat in the blood.

In short, I was very sick for a couple of weeks and had to go without eating for a week to reduce the inflammation. A year went by, with no recurrences, but I wasnt doing anything about it either. In fact, I stopped taking my medications, and started to eat bad things that I normally didnt eat often. I was in a depression for a bit, and I did what made me feel good.

Well, fourteen months after my first episode, I had another. I spent 10 days in the hospital this time, not eating or drinking anything, being miserable away from my family. I vowed to change things, so this wouldnt happen again. That was 2 months ago.

Well I finally decided to do something about it! I adopted myself a workout buddy, an acquaintance from down the street who needs to lose weight too. Were going to start tonight, and Im pretty excited about it. Im excited because Im taking action, taking control from my body and doing something, just for me. I dont want to have a heart attack at 30 or 40 because I wasnt careful, and I dont want to continue to take so much medication. Not to mention, I dont want to have another bout of pancreatitis.

So tonight were going to walk/jog, and do some lunges and squats and I will add weight lifting and yoga to my routine. I cant wait to get started.... Wish me luck!!

Thursday, April 15, 2010

Planning a menu


http://imagecache2.allposters.com/images/SAG/LG082.jpg


Part of being a good homemaker is providing healthy and wholesome meals for your family. Sometimes you have to do this with a tight budget, and thats where menu planning comes in. The biggest benefit to menu planning is saving money. More money saved, more money earned. And it is absolutely possible to eat well, and eat healthy, on a tight budget. Its easy to get overwhelmed with creating a menu, but if you take it slow and dedicate a little bit of time here and there, you can become an old pro at it. Once you establish a rough draft, adding to your menu will become easier and easier each time you do it.

Here's some ideas of how to do it.

Every other Thursday and Friday I plan my family's menu for two full weeks. There are a few things I have to take into consideration when making my plan. The budget for the two weeks I have to work with determines what goes on my plan, then the sales adds and coupons I have play a part, family plans, and finally my master list.

My master list consists of things I always need to have on hand, things like flour, sugar, butter, peanut butter, popcorn....I have one for the pantry and one for the fridge. I almost always need to replenish something from my list when doing my shopping. I also always shop in bulk, because this will save money on things I use often. I will replenish whatever stock needs it before anything else, so I check my pantry and write down what I need to restock, then I check it against the master list. Funny thing is, Ive been doing this for so long, I can mentally cross things off and add things, without checking the list anymore. This is another benefit of menu planning. I do still keep a shopping list.... Im efficient, not crazy!

When you first start out, the best thing to do is make a list of ALL the meals (breakfast, lunch and dinner) (including the sides) you can make, all the snacks you eat, and the things you drink. This is the most time consuming part of meal planning, it took me 3 1/2 hours to put down a full months menu (in an organized and easy to sort way) on the computer. You can do this on paper or on the computer, whatever is easier for you. I will say this though, nothing can get spilled on or torn when its stored on the computer. Things like breakfasts, snacks and drinks frequently repeat themselves, so this helps when creating a weekly, bi-weekly or monthly menu.

After you've made your meal list, make a check next to the things you eat most often. This will get you on your way to creating a master list. The most likely items on that will include cereals, pancake mixes, lunch meats.....Next, take a break. That was a lot of work, I know, but totally worth it in the long run.

Now you're ready to create the plan! All you need to do now is decide what you want to include, and how long you want that meal planner to last. Plan your meals, starting with breakfast and including snacks. These plans can be as intricate or as simple as you would like, just make sure you have in mind the amount of food you need. Check your coupons, your sales ads before you begin planning, and the master list, because these will determine what you can make based on budget, as well as what you may want to buy now during this sale or before the coupons expire. Star the things you need from your master list on your menu. Once you've gotten everything down, start your shopping list, starting with your starred items, then going over each meal to see what you will need, then check against your pantry list to see what you may already have.

Heres a sample day of mine based on this weeks sales:
BREAKFAST-oatmeal*, with apples (I try to always have apples, but sometimes they're too expensive to buy) and cinnamon and orange juice
SNACK- yogurt*, with blueberries and chopped almonds*
LUNCH- (this will sometimes be leftovers, so keep that in mind when planning as well.)  Tuna* sandwiches with carrot sticks* and chips (frito chips are on sale this week, for .99), with juice*
SNACK- I try to have two before dinner to serve, usually a healthy snack and a treat like cookies or brownies. Chocolate chip cookies with milk*, right after school. Popcorn*, a pear and a string cheese*
DINNER- Coconut shrimp with orange sauce for dipping, garlic bread, steamed broccoli*

Get the idea? Once you have your menu down, you'll be able to see what you need pretty much right off, you will know what you need because you have checked your master list, and you can better gauge the amounts of certain things you will need. For instance, if you serve cold cereal 5 days a week, your milk consumption will go up, but you wont need as much pancake or waffle makings, and vise versa. In my family we use about 1/2 cup of milk for cereal and 1/4 for oatmeal, and oatmeal is cheaper than cereal, usually, so we have that 3 days a week. The more cold cereal we have, the more milk we need.

To cap this off, heres a few quick tips to consider:
*save money by preparing your own fruits and veggies; forget the convenience packages, they typically run you about 3 bucks more for less.
*buy only whats on sale, and never steer from your list.
*try to buy in bulk whenever possible. not only does it save money, but you consume less. Less packaging and less shipping=less carbon footprinting
*check out farmers markets in your area, 9 times out of 10 you're gonna get a better deal on in season produce
*consider planting a few staples of your own, including herbs. maybe even think of raising chickens for fresh eggs.
*when your family's extracurriculars make it difficult to get a meal made, a menu will come in handy because you can better prepare. Plan quick and easy or crock pot meals and prep the night before or in the morning. You can eat earlier or later than usual this way, no more spendy fast foods or unhealthy convenience items. You'll have snacks prepared ahead of time as well to tide everyone over.
*have one or two nights a week dedicated to a left over meal. this is one of my favorite ways to be frugal!

To sweeten the pot:
I can feed my family of 5+ (WE OFTEN HAVE EXTRAS!!), very, very well on $400 or so a month, and often much less, in Southern California. I used to spend $600 a month for 4 because I wasn't organized and kept buying things that weren't on sale. I also ended up making a lot of the same things for dinner and running back and forth to the store to get something I didn't have, or bought take out because I didn't want to deal with the "Whats for dinner?" question. More trips, more gas used. I was also better able to plan for when we would be busy, like during softball or soccer season, when practices and games dominate the week nights.

Happy planning!!!!!


*edited with a full 2 weeks menu, here.

Tuesday, April 13, 2010

Turning a house into a home

What makes a house a home? Its not about how clean a surface is, or gourmet meals, or designer decor. Its not the size or location of the home. Its not whether you have a job outside the home or are a stay at homer. Its the little things a homemaker does to make her family and friends feel warm and welcome in her home.

Its the welcome mat that has been freshly washed, the pots of flowers and the wind chimes singing in the breeze to welcome guests.
Its the chairs sitting near a window that say, "Sit for a bit."
Its the snapshots of family and friends scattered around the home, and the books just asking to be picked up and read.
Its the windows thrown open wide to let in the sunshine and fresh breezes, the sounds of birds chirping and kids playing.
Its the laughter and the noise.
Its the blankets on the backs of chairs and couches, and the pillows just waiting to be squeezed.
Its a candle glowing warm and bright, and the small knick-knacks telling all who your family is.
Its the freshly polished furniture you take great pride in preserving.
Its the drink offered when someone pays a visit.
Its a batch of freshly baked cookies in the cookie jar.
Its a home cooked meal at the end of the day.
Its a kiss goodnight.

These are the things that make a house a home.

Saturday, April 10, 2010

I am happy to report that some of our "unfinished business" is well on its way to becoming finished! Today my wonderfully amazing hubby patched the walls of the "new" bedroom with what I now know as drywall mud, which, incidentally, is necessary, since the walls were showing some studs where the cupboards tore pieces of the wall away. Tomorrow a second layer will go on and we will be able to proceed with sanding and painting. YAY!

We also picked a few color cards for the room, and since I love collecting them, my purse was full of chips for future wall colors for several rooms of our home, as well as the color for the front and back doors. Apparently I have passed down my obsession with paint to Alanna, our oldest, because she is requesting stripes on her wall and collected her own arsenal of paint cards, specific to her wants.

She WANTS black walls....we compromised on pink with black stripes. So we came home from the depot loaded down with several good pinks. Its now just a matter of getting it just right to go with the bedding....

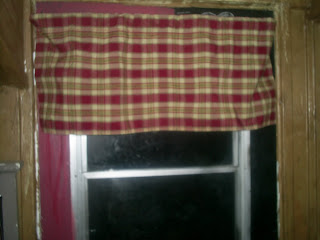
Ive also used the sewing machine for my own purpose, and am really excited with the results of my new kitchen curtains. They are not completely finished, but I will show one valance as a teaser, just to prove Ive really been working at something.... I have eight windows to cover, and have 4 valances done so far, I still need to make eight panels out of semi-sheer red fabric as well.

This is a valance doing its thing, unfortunately the door is sporting a mismatched hue thanks to my efforts to change things; I used a red I wasn't sure about over chalk board paint, about a year ago. I so dislike indecision....Also, I slapped a rod up that wasn't the right size and its crooked since its squeezed between the frame. I promise you, my decorating efforts are not usually so....sloppy. The second picture shows the detail work on the top, and the third shows the bottom hem, and why you shouldn't lift your eyes from your work!